Learning to draw a sitting fox
of reading
There are over forty species of foxes spread around the world. In many cultures foxes are known for their cunning and trick, and are often the subject of myths in folklore. The fox is actually a small species of dog, but foxes have abilities that are missing from other dogs, such as digging burrows into the ground and climbing up to trees.
In this simple drawing guide, you learn to draw your own sitting fox.
For the realization of this tutorial you will need:
- a pen or pencil
- a sheet of paper
- a gum at hand
Find out the guide to draw a sitting fox
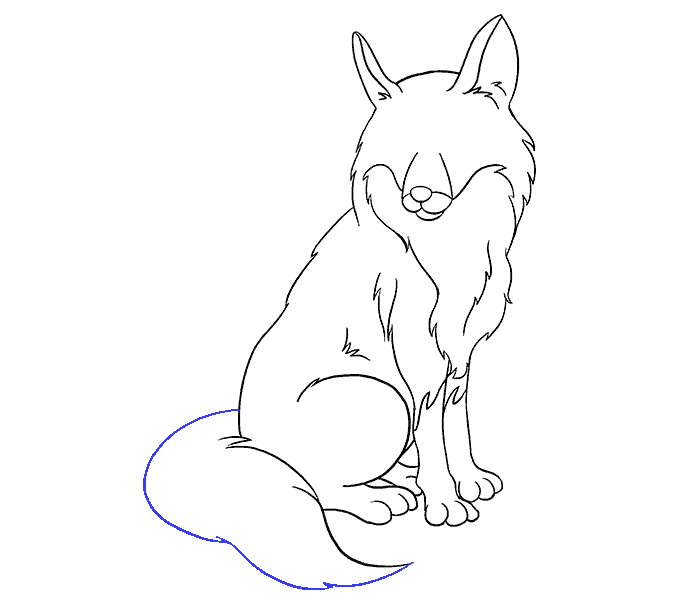
At each step of this drawing tutorial, you will notice that previously drawn lines are displayed in black, while the new lines are in blue. When you finish your drawing, you can shade it using color pencils, markers, or felts.
If you liked this tutorial, you can consult the tutorial for learn to draw a fox easily.
- Step 1
Start by drawing a circle. This one will form the fox's head.

- Step 2
Inside the circle, draw two curved lines.

- Step 3
Connect the lines using two curved lines shaped like "U". Trace another curved line under the first two. It will form the fox snout.

- Step 4
Clear the snout construction line.

- Step 5
Draw an irregular rounded shape inside the snout to form the nose. Connect the nose to the mouth and side of the snout using three short curved lines.

- Step 6
Draw the fur from the fox's neck and chest. Start by extending a curved line from the snout. Then, make a series of curved lines that head down and join in acute and irregular tips.

- Step 7
Repeat this process on the opposite side, forming a roughly reversed triangle.

- Step 8
Draw the fur on either side of the fox's head by extending from by and other of the circle short curved lines that join in serrated tips.

- Step 9
Clear the construction lines formed by the original circle.

- Step 10
Dissolve your ears. For each ear, draw two curved lines upward from the head, letting the lines join in rounded tips.

- Step 11
Clear the guidance lines from the ears.

- Step 12
Trace the contour of the body by extending a series of curved lines diagonally from the head and chest. Let the lines join in serrated points to form the detail of the fur.

- Step 13
Trace the outline of the legs. From the triangular fur tuft on the chest, draw two curved lines downwards. From the shoulder, plot a series of curved lines, which allows for forming a serrated fur at the top. At the base of the body, draw the back leg in a seated position by plotting an open circular figure. Add a serrated fur detail to the top of the open circle. Underneath, draw a series of curved lines to form the back foot.

- Step 14
Relating the lines of the legs by drawing toes on each foot. To draw the toes, use a series of "U"-shaped connected lines.

- Step 15
Add details to your fox. Trace a curved line over the length of each ear and add a serrated fur to its base. Trace short, serrated lines on the chest, shoulder and top of each front paw.

- Step 16
Draw a series of short, long curved lines, joining in points, on the bottom of the body. It's starting to form the tail.

- Step 17
Use a series of curved lines to surround the tail, starting at the base of the back.

- Step 18
Using short curved lines, trace a zigzag pattern on the tip of the tail. Draw a curved triangle at the end of each toe to form the claws. Shake the claws.

- Step 19
Draw a flattened circle on either side of the nose to form the eyes. Inside each eye, trace a small circle inside a large circle. Shake the area between the two circles. Trace a curved line above each eye to form the eyebrows.

- Step 20
Color your fox. The red fox well known is often red or orange with spots of white or cream color, but other species of fox exist in many colors including white, brown, black, and gray.

If you like the eyepiece universe, don't hesitate to take a tour of our shop the red foxWe offer a wide range of articles around the fox!


